Creating Your Dream Outdoor Space: Building Decks and Patios

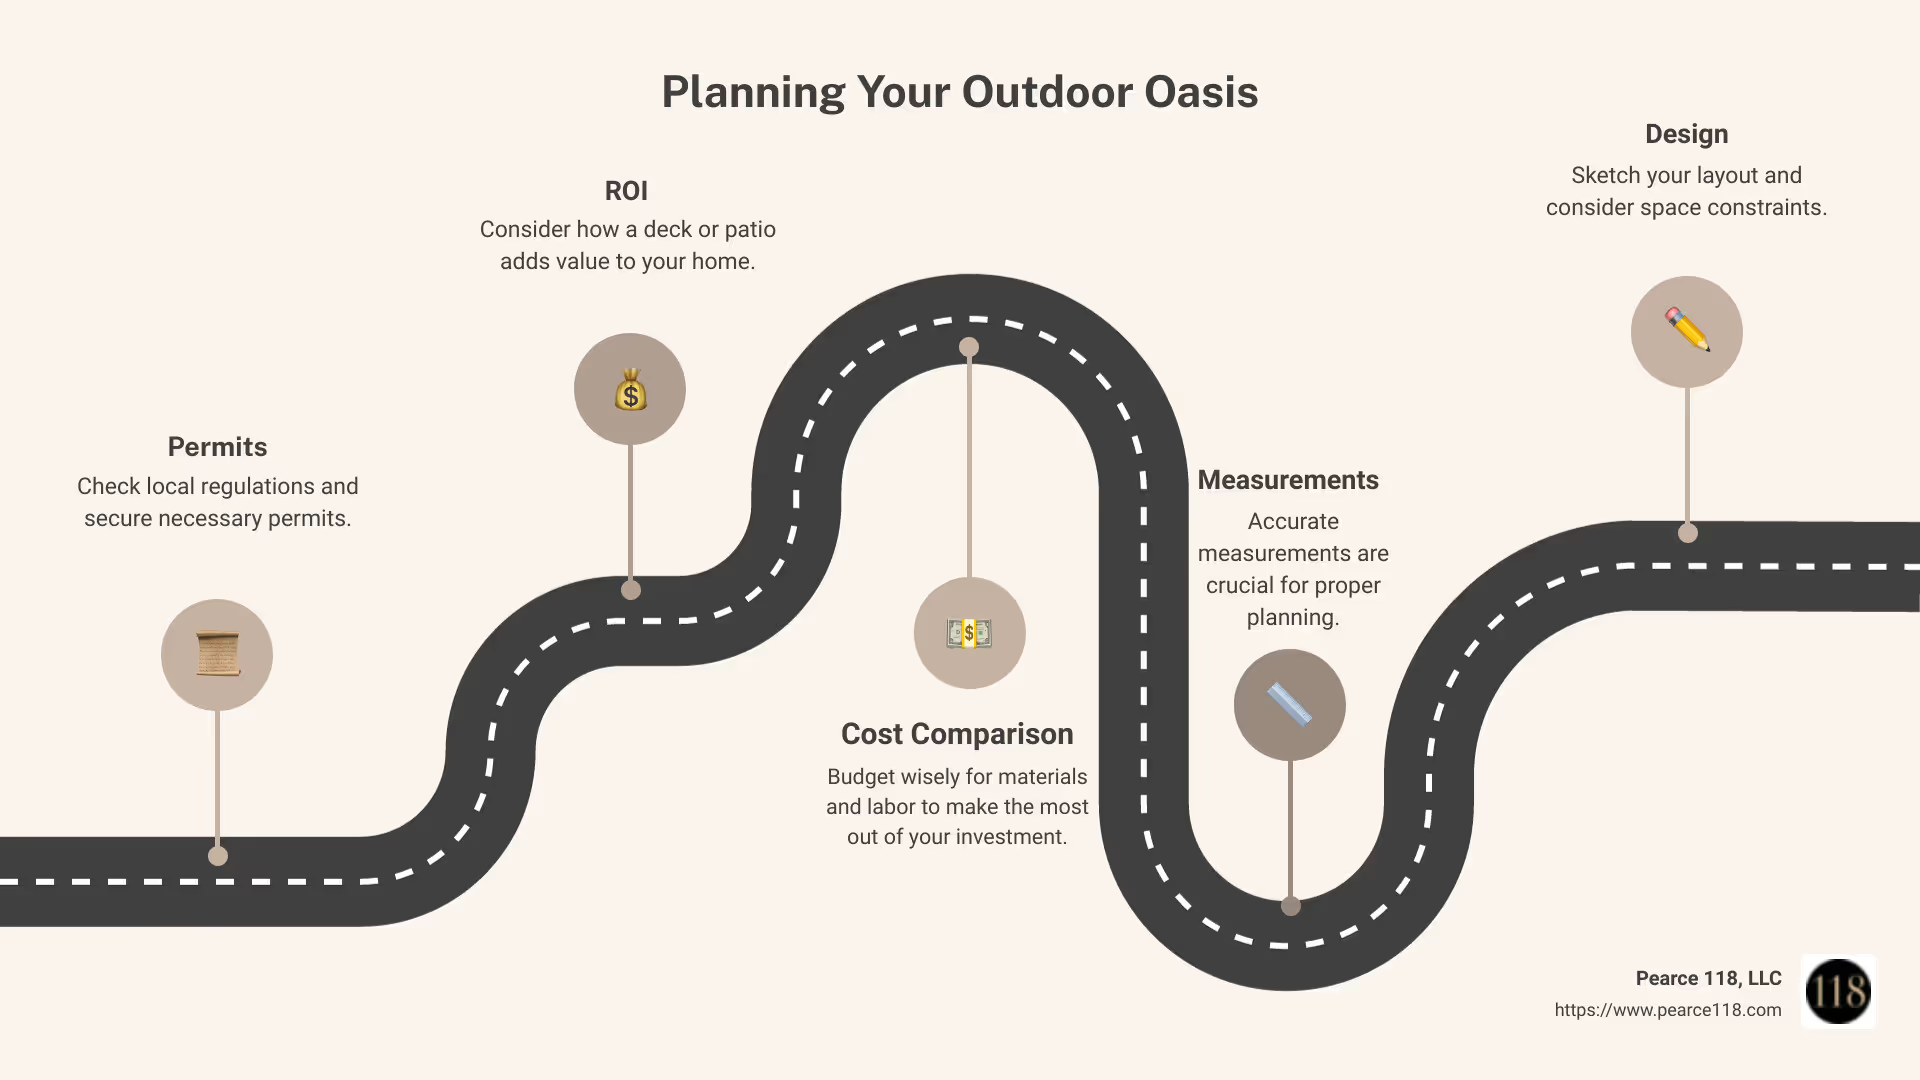
Planning Your Outdoor Oasis
Building decks and patios can transform your outdoor space into a beautiful extension of your home. But before you jump into construction, there's some important planning needed to ensure a smooth process:
- Permits: Check local regulations and secure necessary permits.
- ROI: Consider how a deck or patio adds value to your home.
- Cost Comparison: Budget wisely for materials and labor to make the most out of your investment.
When you start with proper planning, your deck or patio not only improves your property but also offers a valuable return on investment.

Planning Your Deck or Patio
When building decks and patios, the planning phase is crucial. Let's explore the key aspects of planning your dream outdoor space.
Evaluating Your Space
Start by evaluating your space. This involves taking precise measurements and considering how you'll use the area. Ask yourself:
- How much space do you have?
- What will you use it for? Dining, lounging, or both?
- Are there any constraints like trees, fences, or uneven ground?
For example, Ryan from Pearce 118 transformed a "dead" area in his side yard into a functional grilling area. By evaluating the space, he was able to identify the best use for it.
Steps and Foundation
Next, consider the foundational elements:
- Steps: Do you need steps? If yes, how many?
- Concrete Post Forms or Deck Blocks: These are essential for stability. Concrete post forms are more permanent, while deck blocks are easier to install and move if needed.
Sketching Your Design
Once you have your measurements, start sketching your design. This helps visualize the layout and identify potential issues early on.
Measurements and Sketches
- Measurements: Ensure your measurements are accurate. This will save time and money later.
- Sketches: Draw your design on paper. Include all elements like railings, stairs, and furniture placement.
Ryan found that the fence line running at an angle to his house required some trial and error in his sketching phase. He adjusted his design to avoid a big gap, ensuring a seamless look.
Trial and Error
Don't be afraid of trial and error. Adjust your sketches based on the space constraints and practical considerations. This iterative process helps refine your design.
Local Regulations and Permits
Before you finalize your design, check local regulations and secure necessary permits. This ensures your deck or patio complies with safety standards and building codes.
- Permits: Contact your local building department to understand the required permits.
- Regulations: Make sure your design adheres to local zoning laws and homeowners association rules.
Design Tools and Size Considerations
Use design tools to create detailed plans. Our Deck Design Tool is a great resource for this. It helps you:
- Create deck plans
- Get cost estimates
- Build a materials list
Size Considerations
Ensure your deck or patio is the right size for your needs:
- Furniture: Make sure there's enough room for outdoor furniture and movement.
- Deck Boards: Plan the size to avoid narrow pieces at the ends. Deck boards are typically 5-1/2 inches wide.
By carefully planning your deck or patio, you set the stage for a smooth construction process and an outdoor space you'll love.

Now that we've covered planning, let's move on to choosing the right materials for your deck or patio.
Choosing the Right Materials
When it comes to building decks and patios, selecting the right materials is crucial. Your choice will impact the durability, cost, and maintenance of your outdoor space. Let's explore the two main options: wood decking and composite decking.
Wood Decking
Wood decking is a classic choice known for its natural beauty and strength. The most common type of wood used is pressure-treated lumber. This wood is treated to withstand weather and resist rot and pests, making it a durable option for outdoor structures.
Benefits of Wood Decking:
- Cost-Effective: Wood is generally cheaper upfront compared to composite materials.
- Natural Aesthetic: Offers a timeless, natural look that many homeowners love.
- Customizable: Can be stained or painted to match your desired color scheme.
Considerations for Wood Decking:
- Drying Time: Pressure-treated lumber is usually wet when delivered. It needs to dry for about six months before staining.
- Ground Contact: Use wood rated for ground contact to prevent rotting.
- Maintenance: Requires regular maintenance like staining and sealing to prolong its lifespan.
- Safety: Wear a dust mask and eye protection when cutting wood. Also, never burn pressure-treated wood as it releases harmful chemicals.
Composite Decking
Composite decking is made from a mix of wood fibers and plastic. It's a popular alternative to wood due to its low maintenance and long-lasting durability.
Benefits of Composite Decking:
- Low Maintenance: Requires minimal upkeep compared to wood. No staining or sealing is needed.
- Durability: Resistant to rot, insects, and harsh weather conditions.
- Variety: Available in various colors and textures to mimic the look of natural wood.
Considerations for Composite Decking:
- Cost: Generally more expensive than wood initially, but can save money in the long run due to lower maintenance costs.
- Installation: Often easier to install, especially with vinyl railings that complement the composite boards.
- Environmental Impact: Made from recycled materials, making it an eco-friendly option.
When choosing between wood and composite decking, consider factors like budget, maintenance preferences, and the climate in your area. For example, composite decking is ideal in areas with extreme weather due to its high resistance to weather damage, while pressure-treated lumber might be more suitable for those on a tighter budget who don't mind a bit of upkeep.

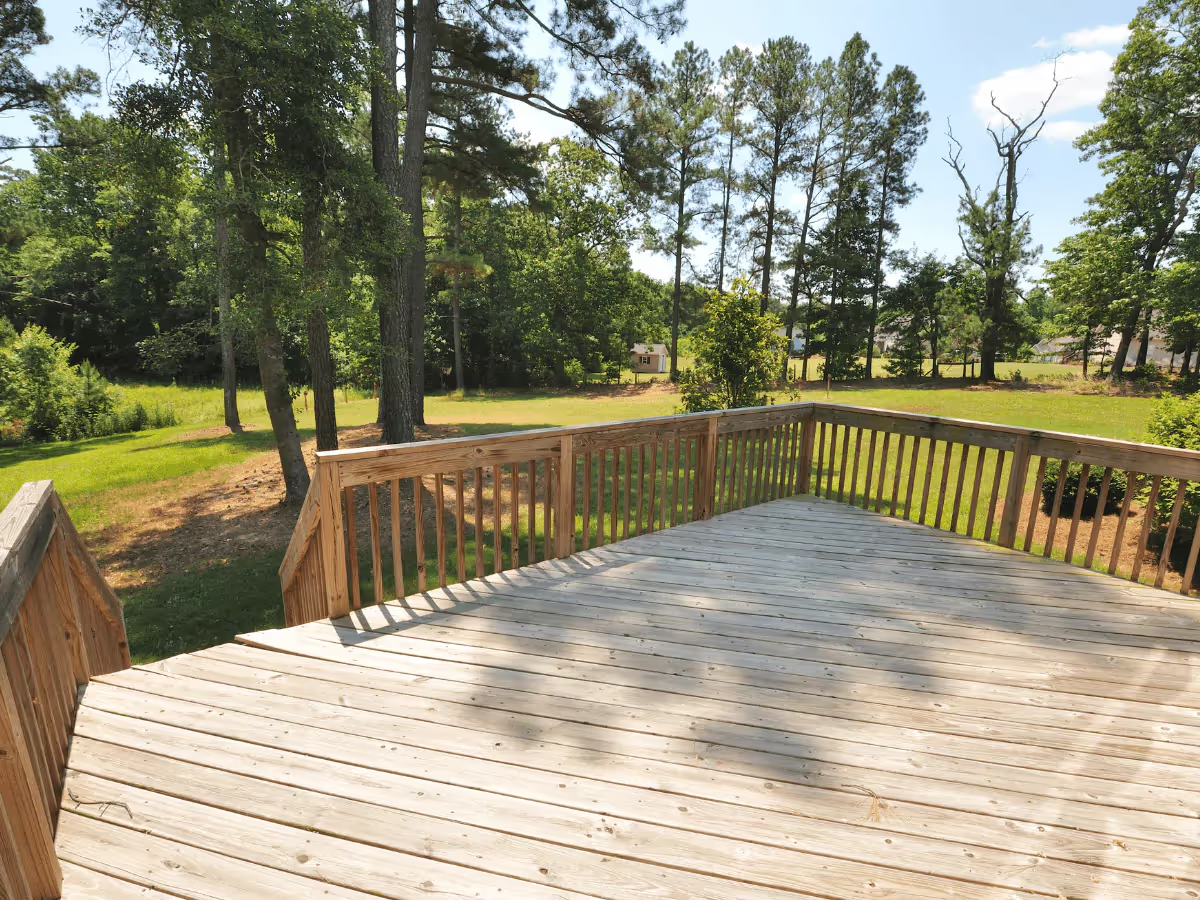
Wood decking offers a timeless, natural look.

Composite decking is low-maintenance and durable.
By understanding the pros and cons of each material, you can make an informed decision that best suits your needs and preferences. Now that we've covered material choices, let's move on to the actual construction process.
Building Your Deck
Laying Out the Deck Area
Before you start building, it’s crucial to lay out your deck area properly. This will ensure your deck is square and everything fits as planned.
- Mark the Layout: Use strings and batter boards to outline the deck's perimeter. Batter boards are simply 2-foot furring strips screwed together to form a "T" shape. Place these at each corner and run strings between them to mark the edges.
- Check Measurements: Double-check all measurements for accuracy. Ensure the layout is square by measuring diagonally from corner to corner. The measurements should be equal.
- Adjust as Needed: If your measurements are off, adjust the batter boards and strings until everything lines up perfectly.
Working with Pressure-Treated Lumber
Pressure-treated lumber is commonly used for the structural parts of your deck. Here’s how to handle it safely and effectively:
- Use the Right Fasteners: Choose stainless-steel or hot-dipped galvanized screws and hardware, as these are specifically labeled for treated lumber.
- Drill Pilot Holes: To prevent splitting, always drill pilot holes in the ends of boards before nailing or screwing them together.
- Safety First: Wear a dust mask and eye protection when cutting or handling treated wood. Wash your hands after working with it and dispose of sawdust and waste according to local regulations. Never burn pressure-treated wood or use it as mulch.
Foundation and Posts
- Dig Post Holes: The foundation starts with digging holes for the deck footings. Call 811 to have underground utilities marked before you dig. The depth and diameter of the holes depend on local building codes and the size of your deck.
- Set Posts: Use 4-inch-by-4-inch posts for the vertical supports. Place them in the holes and fill with concrete, ensuring they are plumb and level.
Beams and Bracing
- Install Beams: Use 2-inch-by-10-inch beams to span the posts. These will support the joists. Secure them with metal brackets or bolts.
- Add Diagonal Bracing: For added stability, install 2-inch-by-4-inch diagonal braces between the posts and beams.
Framing and Joists
- Frame the Deck: Use 2-inch-by-8-inch lumber for the framing and joists. Lay out the perimeter first, then fill in with the joists spaced 16 inches apart.
- Joist Hangers: Attach the joists to the beams using joist hangers, ensuring they are level. Use joist hanger nails for added strength.
Decking
- Install Deck Boards: Use 5/4-inch decking boards for the surface. Lay them perpendicular to the joists, leaving a small gap between each board for drainage. Pressure-treated wood will shrink as it dries, so butt the boards tightly together if they are wet.
- Fasten Securely: Use deck screws designed for treated lumber to secure the boards.
Stairs and Railings
- Build Stairs: If your deck is liftd, you’ll need stairs. Use stringers to support the steps and attach treads.
- Install Railings: For safety, add railings around the deck. Use posts, balusters, and top rails to create a sturdy barrier. Make sure the railings are clear of windows and out-swinging doors.
By following these guidelines, you can ensure a sturdy and safe deck that will last for years. Next, we’ll dive into some DIY deck building tips to help you save time and money.
DIY Deck Building Tips
Step-by-Step Guide
Building your own deck can save you a lot of money and give you a sense of accomplishment. Here's a simple step-by-step guide to get you started.
- Budgeting: Before you buy any materials, set a budget. Decks can be built for as little as $350 if you plan carefully. Consider costs for materials, tools, and any permits you might need.
- Gather DIY Tools: Make sure you have all the tools you'll need. Basic tools include a circular saw, cordless drill, level, hammer, and a post-hole digger.
- Digging and Installing Deck Blocks: Mark your deck layout with stakes and twine. Use marking paint to mark the spots where you'll dig holes for the deck blocks. Dig holes and place the deck blocks, ensuring they are level.
- Building the Frame: Use pressure-treated lumber for the frame. Attach beams to the deck blocks using joist hangers and angle braces. Make sure everything is level and square.
- Spacing Joists: Install joists using joist hangers, spaced 16 inches apart. This will provide a strong foundation for your decking boards.
- Installing Decking: Lay your decking boards perpendicular to the joists. Use deck screws to secure each board, making sure to leave a small gap between boards for drainage.
Finishing Touches
Once your deck is built, it's time to add the finishing touches to make it look great and last longer.
- Deck Tape: Apply deck tape to the tops of your joists before installing the decking. This will protect the wood from moisture and extend the life of your deck.
- Weed Mat: If your deck is close to the ground, place a weed mat underneath to prevent weeds from growing up through the gaps.
- Staining and Sealing: Once your deck is complete, let the wood dry for a few months before staining. Use a high-quality deck stain and sealant to protect the wood from the elements.
- Painting: If you prefer a painted look, choose a paint designed for outdoor use. Make sure the wood is completely dry and clean before painting.
By following these steps and tips, you can build a beautiful and functional deck that improves your outdoor space. Next, we'll discuss the cost considerations to help you budget your project effectively.
Cost Considerations
Building a deck or patio can be a significant investment, but understanding the cost breakdown can help you budget effectively. Let's explore the key factors that influence costs and how you can save money.
Cost Breakdown
Average Costs: The cost to build a deck or patio varies widely based on size, materials, and labor. On average, a basic deck costs between $15 to $35 per square foot. High-end materials and complex designs can push costs to $50 per square foot or more.
Material Costs: Materials are a major part of your budget. Pressure-treated lumber is typically the most affordable, starting at around $2 to $3 per square foot. Composite decking is more expensive, ranging from $7 to $10 per square foot, but it requires less maintenance.
Labor Costs: Hiring a contractor can add significantly to your costs. Labor typically ranges from $8 to $22 per square foot. This cost covers everything from design to installation, ensuring a professional finish.
DIY Savings: Opting for a DIY approach can save you a lot of money. For instance, Scott Allen Perry built his own 16x16 deck using pressure-treated lumber, significantly cutting down on labor costs. However, be prepared for the time and effort required.
Budget-Friendly Tips
Saving Money: Here are some practical tips to keep your costs down:
- Use Pallet Wood: Liz and Doug from Hoosier Handmade built a pallet wood deck with only five major materials: pallet boards, concrete blocks, sand, gravel, and stain. This approach can save you a lot on materials.
- Choose Pressure-Treated Wood: This is one of the most cost-effective materials. It's durable and can be stained to mimic more expensive woods.
- DIY Labor: If you're handy, doing the work yourself can save you thousands of dollars. Just make sure you're comfortable with the scope of the project.
Deck Size: The size of your deck will significantly influence costs. A larger deck requires more materials and labor. Planning a smaller, more efficient space can help you stay within budget.
Material Choices: Opt for budget-friendly materials like pressure-treated lumber. While composite decking is low-maintenance, it comes at a higher upfront cost.
DIY vs. Contractor: Weigh the pros and cons of DIY vs. hiring a contractor. A contractor can ensure a professional finish and handle complex tasks like attaching a ledger board to your house. However, if you have the skills and time, DIY can be much cheaper.
By understanding these cost considerations and applying budget-friendly tips, you can create a beautiful outdoor space without breaking the bank.
Next, let's address some frequently asked questions about building decks and patios to help you make informed decisions.
Frequently Asked Questions about Building Decks and Patios
Is it cheaper to pour a patio or build a deck?
Cost Comparison: Patios are generally cheaper to install than decks. The average cost to pour a concrete patio ranges from $1,500 to $3,000 for a 200 square foot area. In contrast, building a deck of the same size could cost between $4,000 and $12,000, depending on the materials used.
ROI: Decks often offer a higher return on investment (ROI) compared to patios. According to the National Association of Realtors, a deck can recoup up to 75% of its cost upon resale, whereas a patio may only recoup about 50%.
Installation Costs: Labor costs for patios are typically lower because the process is more straightforward. Pouring concrete or laying pavers is less labor-intensive than constructing a deck, which requires framing, joists, and railings.
How much does it cost to build a 20x20 deck?
Average Cost: Building a 20x20 deck can cost anywhere from $8,000 to $20,000. This wide range depends on the materials and complexity of the design.
Material Options:
- Pressure-Treated Lumber: Costs about $15 to $25 per square foot. It's the most budget-friendly option but requires regular maintenance.
- Composite Decking: Costs about $30 to $45 per square foot. It’s more expensive upfront but requires less maintenance and lasts longer.
- Hardwood (like Ipe): Costs about $40 to $80 per square foot. It's durable and aesthetically pleasing but can be difficult to install.
Cost-Saving Tips:
- DIY Labor: If you have the skills, doing it yourself can save you a significant amount of money.
- Plan Ahead: Design your deck to use standard-sized materials to minimize waste.
- Off-Season Construction: Building during the off-season can lower labor and material costs due to reduced demand.
Can I build a deck directly on the ground?
Ground-Contact Wood: Yes, you can build a deck directly on the ground, but you must use ground-contact wood. This type of wood is treated to resist moisture and decay, making it suitable for direct contact with the soil.
Substructure: Ensure the substructure is adapted for minimal height. Use concrete deck blocks or gravel to lift the deck slightly, which helps with drainage and prevents wood rot.
Height Considerations: Even though these decks are often called "ground-level," they should be liftd up to 24 inches above the ground. Decks less than 8 inches high are easier to build and often do not require permits.
By understanding these common questions, you can make informed decisions about your outdoor space, whether you choose to build a deck or pour a patio.
Conclusion
At Pearce 118, LLC, we pride ourselves on generational expertise and meticulous craftsmanship in building decks and patios. Our team has been serving the communities of Nassau and Suffolk County for decades, bringing a wealth of knowledge and experience to every project.
From initial planning to the final touches, we are committed to creating outdoor spaces that not only meet your needs but exceed your expectations. Our attention to detail ensures that every deck and patio we build is not only beautiful but also durable and functional.
Whether you're looking to improve your backyard with a new deck or patio, our expert team at Pearce 118, LLC is here to help you every step of the way.
Ready to transform your outdoor space? Contact us today to get started on your dream project.
Contact Us
Corporate Office
Massapequa Park, NY 11762


